If you already have it installed on your computer and are already using it, you will agree that the OneDrive client is of great use. It lets you drag and drop a file to OneDrive to sync the file to your account. But, wouldn’t it be great if you could back up a large number of files by simply transferring to your account via the ‘Send to’ menu. We have already seen how you can add or remove any item to the Send To context menu. You can do so manually or simply use freeware SendToSendTo. Although pressing the Shift key and right-clicking will offer you many more hidden entries, you will not see OneDrive. But using the same method, you can also add the OneDrive shortcut to the ‘Send to’ menu so that you can send a large number of files in a snap.
Add OneDrive shortcut to the ‘Send to’ menu
Open C:\Users\Username directory. Look for the OneDrivefolder.
When you find it, right-click on it and from the menu, choose ‘Create Shortcut’.
Next, press Win+R in combination to bring up the Run dialog box. In it type ‘shell:send to’ and press Enter.
This will open the SendTo folder directly.
Then, copy the shortcut that we created in step 1 and paste it in the SendTo menu. That’s it!
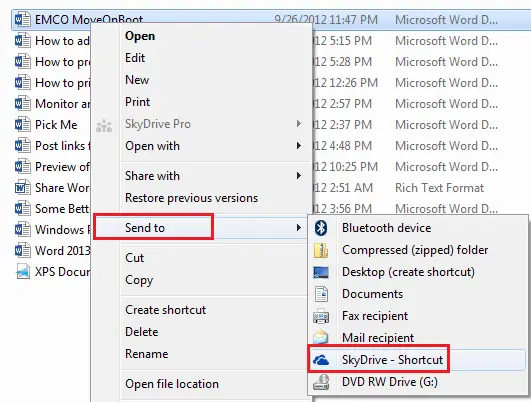
You will now find the OneDrive (earlier SkyDrive) shortcut appearing in the SendTo menu, whenever you right-click a file. Take a look at the screenshot below.
Do note that whenever you are planning to send the files to a OneDrive subfolder, you will have to manually drag and drop the file.
