0x8004010F, Outlook data file cannot be accessed
When you try to send or receive emails in Microsoft Outlook, you may receive one of these error messages:
0x8004010F: Outlook data file cannot be accessed OR0x8004010F: The operation failed. An object could not be found
This error occurs on Outlook 2010 and Outlook 2013 versions due to the corruption of the Outlook profile. Typically, it doesn’t allow the application to send or receive email messages. What is causing this error? A few of certain causes which intrude Outlook from sending or receiving emails comprise:
Outlook data files (.pst) are located at the wrong placeOutlook data files are moved to a different locationPost upgrade the current Outlook profile gets corruptedOutlook profile is not tested properly.
Since this error will prohibit you to send/receive any emails, resolving it at the earliest should be your priority.
How to fix the Outlook error 0x8004010F
Depending upon the real reason behind the error, users need to opt for different ways to fix this Outlook error. Here are a few fixes that can help. Let’s look at these options in more detail.
1] Create a new Outlook profile
When the cause behind the error is a corrupted Outlook profile, making a new one can fix the error. To resolve Outlook error 0x8004010F, you will need to recognize the current location of your default Outlook data file, and then make a new Outlook profile and set it default. Here’s how to do this: Step 1 – Locate the default Outlook data file
From the ‘Start Menu’ open ‘Control Panel’
Click ‘Mail’ to open the ‘Mail Setup – Outlook’ dialog box
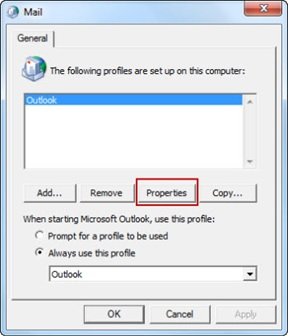
In the ‘Mail Setup – Outlook’ dialog box click ‘Show Profiles’.
Select your current Outlook Profile and hit ‘Properties’.
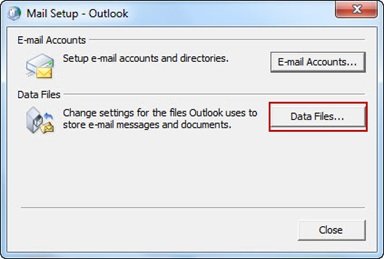
Again, in the ‘Mail Setup – Outlook’ dialog click ‘Data Files’ to open the ‘Account Settings’ dialog.
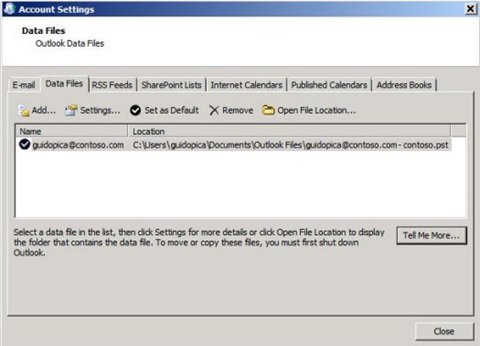
Click on the ‘Data Files’ tab. Now note the name and location of the default Outlook profile. Please note, the default profile will be represented by a checkmark.
Click ‘Close’ to exit Step 2 – Create a new Outlook Profile You can create Outlook profiles in two ways, one Use auto account set up to create an IMAP or POP3 email account or manually create an IMAP or POP3 email account. Below we list the steps for both the options: Option A – Auto-setup IMAP or POP3 email account:
Go to ‘Control Panel’ and click ‘Mail’ to open the ‘Mail Setup – Outlook’ dialog
In the new dialog box click ‘Show Profiles’.
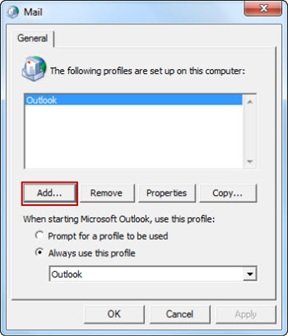
Select your current Outlook profile and then hit ‘Add’.
In the ‘New Profile’ dialog box, type a name for the new profile and click ‘OK’
This will open the ‘Add New Account’ dialog box
Input your email information and click ‘Next’ to configure the new profile
Once configuration completes, click on ‘Finish’. Option B – Manually create IMAP or POP3 email account:
Go to ‘Control Panel’ and click ‘Mail’ to open the ‘Mail Setup – Outlook’ dialog
In the new dialog box click ‘Show Profiles’.
Select your current Outlook profile and then hit ‘Add’.
In the ‘New Profile’ dialog box, type a name for the profile and click ‘OK’
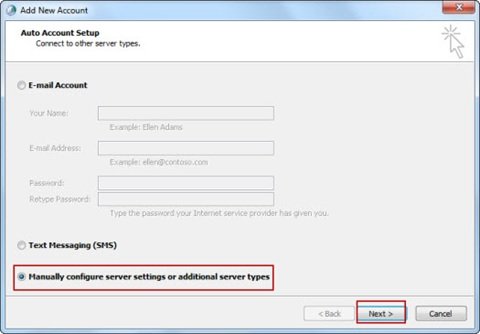
This will open the ‘Add New Account’ dialog box, here select ‘Manually configure server settings or additional server types’ and click ‘Next’.
Now in the ‘Choose Service’ dialog box, select ‘Internet E-mail’ and click ‘Next’
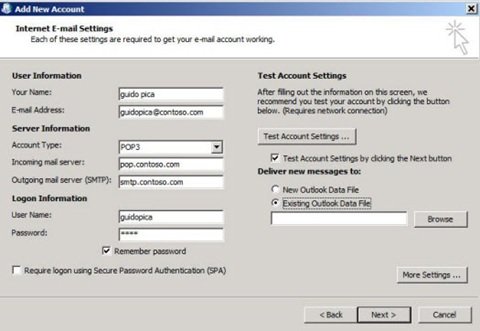
In the ‘Internet E-mail settings’ dialog manually your account details
Click ‘Test Account Settings’ to examine your account
Now select the ‘Existing Outlook Data File’ option and click ‘Browse’ to open the ‘Open Outlook Data File’ dialog.
Find and select the Outlook data file you located previously
Follow path OK -> Next -> Close -> Finish. Step 3 – Configure the new Outlook profile as the default This is the final step for this fix: The new Outlook data file is now created, and should in all probabilities work without any problems.
2] When making a new Outlook profile is not possible
Few users have many email accounts in Outlook and creating a new profile may not be feasible for them. In such a case, you can fix the error by changing the message delivery location to a temporary folder and then changing it back. Follow these steps to fix error 0x8004010F: This may fix the error. These were some well-known methods to resolve the Outlook error 0x8004010F. We hope you found these tips useful and consequently, use them to fix the error and get an uninterrupted usage of Microsoft Outlook.