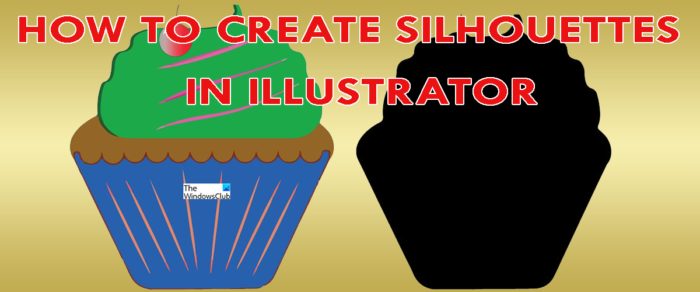
What is a silhouette?
A silhouette is the image of a person, animal, object, or scene represented as a solid shape of a single color, usually black, with its edges matching the outline of the subject. The interior of a silhouette is featureless, and the silhouette is usually presented on a light background, usually white, or none at all. You can use Illustrator to create silhouettes for use on digital media or printing and then cutting out. Since Illustrator is vector based, the silhouette can be stretched or shrunk without getting pixelated. Illustrator provides several ways to create silhouettes but there is a super easy way to create silhouettes in Illustrator. As long as you can get the path/outline of the image you can create a silhouette of it. Silhouettes can be created using the Pen tool, Pencil tool, and Image trace. There are other ways if you have the skills. You may have to use a combination of tools to get the best result, but those are the major tools.
How to create a Silhouette in Illustrator
To make a black-and-white vector Silhouette in Adobe Illustrator we will use the Image trace option to create silhouettes:
1] Get the image into Illustrator
The first step to making an image into a silhouette is getting the image into Illustrator. You can open illustrator then go to File then Open then search for the image, select it and press Open. You may also find the image file where it is saved, right-click on it and choose Open with then Open with Adobe Illustrator (version). The image will be opened in Illustrator on a canvas.
2] Analyze the image
This step is very important, it will help you choose the method that you will use to make the image into a silhouette. The background will have to be removed to get the subject of the image to be made into a silhouette. This means that the images with very colorful backgrounds will be harder to cut out. However, Illustrator makes it quite easy. If you can use the Pen tool, you can easily cut around the subject of the image. This article will use the Image trace option but you will still have to analyze the image to see if this method is best. Images with lots of similar colors will prove difficult with the Image trace option, this is so because the background and the subject image may have some similar colors. This will make it harder for you to delete unwanted colors.
3] Image trace
Now that the image is in Illustrator and you have analyzed it, you are now ready to do the Image trace. Image trace is an Illustrator tool that allows you to vectorize your image or break them down into specific colors automatically. This tool comes with a set of modes that allows it to do most of the job automatically. Here are the options:
High-Fidelity Photo and Low-Fidelity Photo – These options produce very detailed and slightly less detailed vector images respectively. They are ideal for photos or complex artwork.3 colors, 6 colors and 16 colors – These presets output vector images with three, six, or sixteen colors. These presets are perfect for logos or artwork with lots of flat colors.Shades of Grey – This preset produces a detailed greyscale image.Black and White Logo – This preset creates a simple logo with two colors – Black and white.Sketched art, Silhouette, Line Art, and Technical Drawing – These presets are best used for specific types of images and create a black-and-white, mostly line-based drawing.
Open your image in Illustrator, this will activate the Image Trace option at the top. Click the drop-down arrow beside Image trace to see the options. You can try each of the Image Trace options and see which is closest to what you are looking for. If you select the image then click the Image trace button then the default image trace option will be used. You will have to choose the specific image trace option that you want to be used.
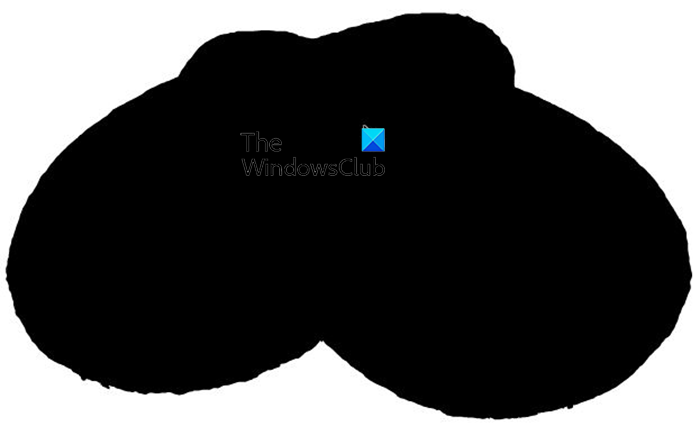
To get to the image trace options, select the image on the canvas then go to the top menu bar where you will see the Image trace button. Click the drop down arrow beside the Image trace button. You may notice that one of the Image trace options is Silhouette. The silhouette option allows you to change images to silhouette automatically. However, this option will not give the best result for images with a colored background. This is the image that will be used for the Image trace. This image has a white background so the results will be better when the silhouette option is used. Just select the image then go to the top menu bar, click the drop-down arrow beside the Image trace button and choose Silhouette. The image will become a silhouette. If the background is white then there will be no further adjustments needed. You just need to click Expand on the top menu bar, this will give a blue outline to the image. This will make the image a vector scalable image. This is the result after the Silhouette option is used for the Image trace. The background of the original image was white so the results were easy to get/ there was no need for any adjustments. Silhouette an image with colored background What would it look like if the background was not plain white? Let us look at another image with a background that was not plain white.
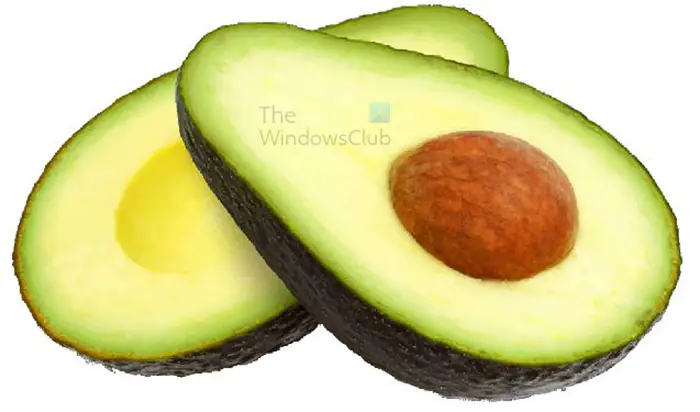
This image has a plain background but it is not white. Let us see what the results will be when the Image trace is used.
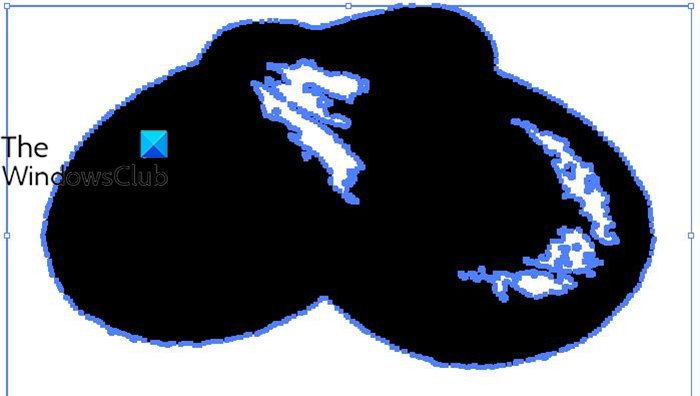
This is the result of the Image trace on an image with a single color background. The best way to get the silhouette using image trace on an image with a colored background is to remove the image background. You can use the pen tool for this or the Image trace tool. In this article, the image trace tool will be used to remove the background and also make the image into a silhouette.
The first step to removing the background with Image trace is to select the image then go to the top menu and click the drop-down arrow beside image trace, you then choose one of the options. In this case, the High Fidelity Photo option will be used. Click High fidelity photo option and Illustrator will get to work.
4] Expand the image
When the Image trace is completed go to the top menu bar and click Expand. You will see a blue outline around the image when you click on it.
5] Delete unwanted colors
To remove the background you just need to click on it and press Delete.
6] Recolor Image
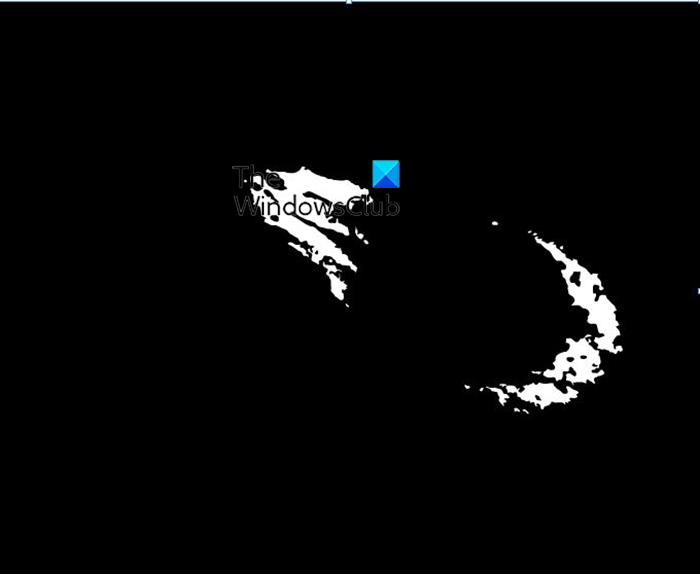
After you have removed the background, you will notice that the image will turn blue when you click on it. Those blue lines are the Paths, they are the different colors divided up so that they can be individually selected and deleted or changed to other colors.
To change the image to a silhouette you will need to change the image from paths to one flat image. This can be done by rasterizing it. T rasterize the image go to the top menu and click Object then Rasterize.
The Rasterize window will appear so that you can choose options. You can click at Color mode and choose RGB, Grayscale, or Bitmap. You can choose the resolution, for higher quality and larger file size choose 300. You can choose a lower resolution if you are going to use it for screen only. For the background you can choose Transparent or White. You can choose to add Pixels, create a clipping mask and preserve spot color. In this case, the only change that will be made is to choose Transparent background. When all is done click Ok to confirm changes or Cancel to close without accepting changes.
This is the image after it has been rasterized. It is now one flat image and able to be made into a silhouette. After the image is rasterized, it can now be made into a silhouette. You just select the image and go to the top menu and click the drop-down arrow beside Image trace and choose Silhouette.
The image when the Silhouette Image trace is applied.
You will notice that some parts of the image have some white. That can be easily fixed. Select the image then go to the top menu bar and press Expand. This will select the colors and make them editable. When the image is Expanded you just have to select the colors that are not what you want them to be (in this case they are the whites). When you have selected them you can go to the color pallet and click the color you want (black). Before you can change the colors, right-click on the image and choose Ungroup. This will allow you to change the individual colors. You can also right-click on the image and choose Release compound path. This will make the image one color (in this case black). Since the color that was needed is black, no further color changes are needed.
This is the silhouette of the image that was on a color background. You can put it back a colored background if you wish.
7] Outline stroke
This is the final step, but it is important. If you leave this step out then elements in the image will distort if you expand or shrink it. To stop this distortion from happening whenever you expand or shrink, select the image then go to Object then Path then Outline stroke.
8] Save
After all that hard work you need to save the file. The first save that should be done is as an Illustrator .ai file. This will allow edits after the file is closed. When the work is completed then it is time to choose a file format that will best fit the use of the image. If it is for use on screens only then a JPEG file can be used, if you want to use both online and print then you can save it as PNG, the PNG file will have no background. For print only save as PNG or TIFF but make sure that the resolution is high. To save as JPEG or PNG go to File then Export. The Export window will appear. choose the file name and the Format then click Use artboards, when you are finished click Save to confirm or Cancel to close the Export window without saving. Read: How to remove Background from Image in Illustrator
How do I make a vector silhouette from a picture?
A silhouette can be made in Illustrator by placing the image in Illustrator and using the Pen tool, Pencil tool, or Image trace to outline the image then you remove the features. A detailed guide is mentioned here and it is recommended to follow it to get it done. Also read: How to create a Silhouette in Photoshop
Can you automatically trace in Illustrator?
Auto Trace as its name implies works as a tracing feature that automatically traces images. It is a feature through which you can trace any raster image and converts it into a vector shape. The feature in Illustrator is called Image trace and it has a lot of options to choose from so that you can get the result to match a wide variety of uses. You can image trace to make a silhouette out of an image.