Delete duplicate rows in Excel
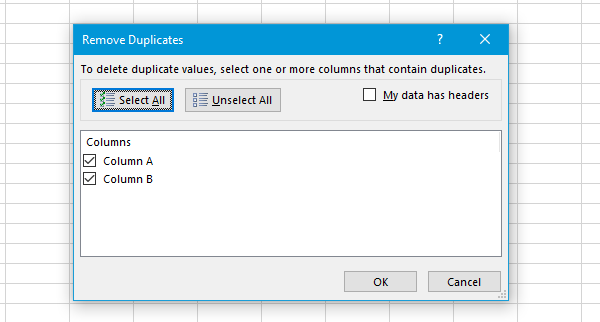
Removing all duplicate rows is not that difficult when using Microsoft Excel since it comes with an inbuilt functionality. To get started, you need to create the Excel spreadsheet. After that, go to Data tab and click on Remove Duplicates button. Now, you will be asked to select the column/s where the duplicate rows are located.
You can select one row at a time if you are not sure. Otherwise, choose all the rows if you know what you are doing.
Delete duplicate rows in Google Sheets
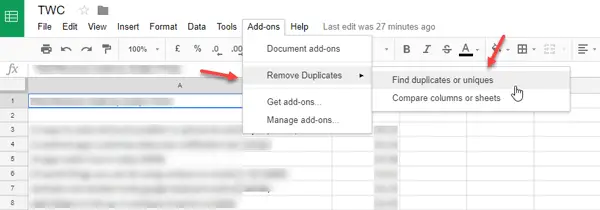
As Google Sheets doesn’t come with any inbuilt functionality, you need to take the help of a Chrome extension called Remove Duplicates. To install this Chrome extension for Google Sheets, you need to open your Google Drive account, and then over to this page and install it. Then, open the desired spreadsheet > click on Add-ons > select Remove Duplicates > Find duplicates or uniques.
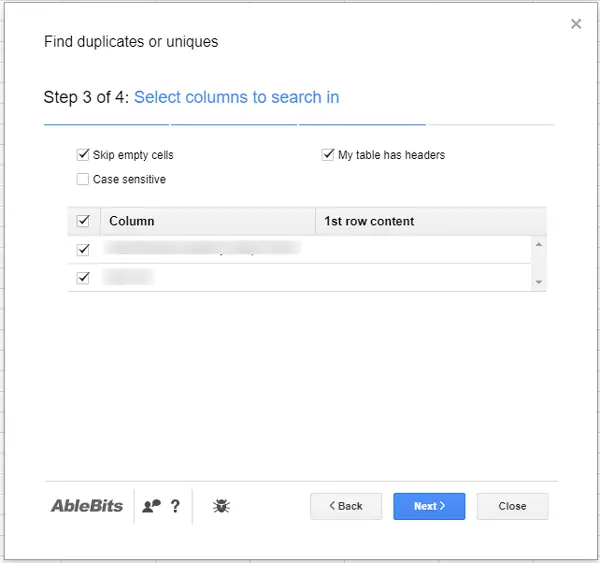
Then you need to select the range of the table. In other words, you can choose the columns and rows range. In step 2 (out of 4), select Duplicates (Find duplicates, exclude the first instances) and go forward. After that, select the column title and hit Next.
In the next step, you need to select Delete rows within selection. After hitting the Finish button, all the duplicate rows will be removed instantly. When using this addon, you need to know one thing. Suppose, you have a price chart related spreadsheet which has only two columns, i.e., Goods Name and Price. If you have the same goods name, multiple times, in Column A and different prices for the same goods in Column B, and you delete duplicate rows from Column A, it will be a mess. But, if you know what you are doing, this tutorial should work fine.