You may want to try and place multiple images into multiple texts and then try to move them around to let them fit. However, that is a lot of work, and getting it uniform and looking seamless may be impossible. The method used in this article to place one image into multiple texts will use one image and place it seamlessly into the texts. This allows for the image and text to be uniform and when other effects are added, everything will blend perfectly. Open Photoshop and prepare your image and let us make this project together.
How to place Image in multiple Texts in Photoshop
1] Open and prepare Photoshop
The first step is to open and prepare Photoshop. Open Photoshop and go to File then New, when the New document dialogue window appears, fill in the details you want then press Ok to confirm. This will open a blank canvas in Photoshop according to the options you chose. You may also find the image on your computer, right-click on it, and click Open With then Adobe Photoshop (version). This will place the image in Photoshop as the background.
2] Add image in Photoshop
The next step is to add the image to Photoshop. You can add the image by going to File and then Open, when the window opens up, search for the image, click on it and click Open. You can also open the image in photoshop by finding the image and then dragging it into a Photoshop that is already open. Another way to get the image in Photoshop is to go to where the image is saved then right-click on it and choose Open with then Adobe Photoshop (version).
3] Duplicate image (optional)
You will duplicate the image once, this will give you two images in Photoshop. This step to duplicate the image serves two purposes but the step is completely optional. The first purpose is to protect the original image from accidental editing. This will ensure that if mistakes are made, the original image will be safe and can be used to redo the project. The other purpose for duplicating the image is that the duplicate will be used to create an effect in step six. Keep reading to find out just what else you can do with this skill that you are learning. Step six may be something that you never thought to do but learning it now will add another dimension to your designs. For now, turn off the visibility for the image that is at the bottom of the layer panel (background image). Read: How to fill Text with Image in Photoshop
4] Add text in Photoshop
Now that the canvas is prepared and the image is in, it is time for the text to be added. Depending on how the image was added, it may be in front of the text and hide it, or it may become the background. If the image is causing problems, you can turn off its visibility until you are ready to use it.
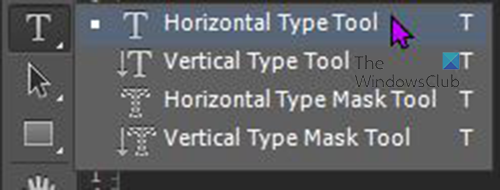
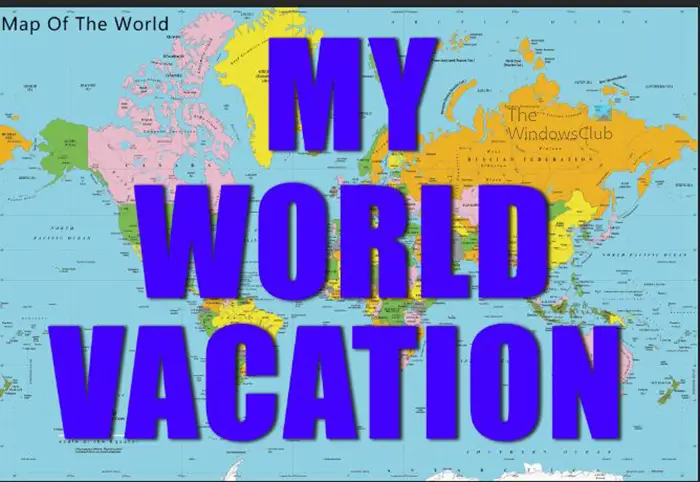
To add the text to Photoshop go to the left tools panel and click the Horizontal Type tool. You can also press T on the keyboard to bring up the type tool. Click on the canvas and type the words. This article will use single text per line with three lines of text. However, you can choose to use multiple texts per line along with multiple lines of text. Each line of text will be placed on a different layer. This will facilitate making edits to each text. You can make each text look different based on what your project requires.
The text will be on one of the images as one of the images will be the background and will be important to one of the ending steps. You can choose to turn off the visibility of the background until you are ready for it.
5] Convert the images and texts to smart objects (optional)
This step to convert the images and texts to Smart objects is optional, however, it allows you to edit the images and texts quickly without having to do the whole thing over. You may want to do the same effect with the same or different text, but you do not want to do the whole thing over.
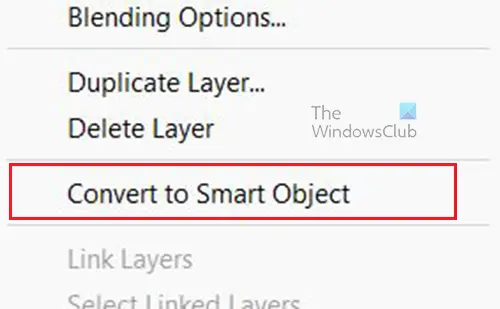
You can convert the images and texts to smart objects by right-clicking on them and choosing Convert to smart object. Smart objects are also better to work with because they will keep their original information even after editing. Smart objects allow for non-destructive editing and effects. Smart objects will not get pixelated when resized like how a rasterized image would.
6] Group texts
With the texts created, you will want to make changes to them. In this article, three lines of single texts will be used. Each line of text will be on a separate layer, this will give you more work when you need to edit. You may need to do the same edits to each of the texts. Grouping the text will allow you to make one edit that will affect all the texts. You will see how this works when applying the image to the texts.
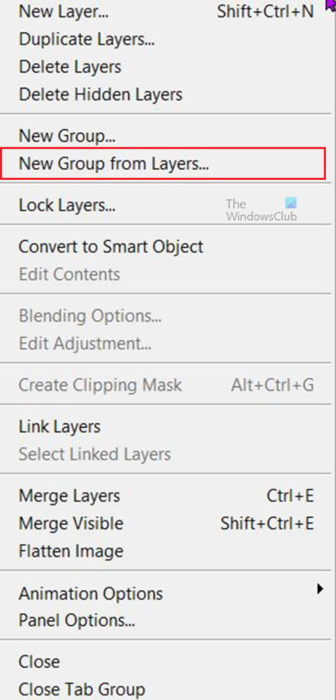
To group the texts, go to the layers panel and select all of the texts. You can click on the first text then hold Shift and click on the last text (if they are all in a line with nothing else between). When all the texts have been selected, go to the top right of the layers panel and click the menu button. When the drop-down menu appears, click New group from layers.
The New Group from layers window will open for you to name the group and choose other options. You can name the group and click Ok to confirm or press Cancel to close without making any changes. When you press Ok, the text layers will be placed in a group. You will see a folder icon with the name you chose. To see the contents of the folder, click the arrow beside the folder.
7] Place the image into the text
For this step, you will see the importance of grouping the text. This step is where the image will be placed into multiple texts. Without the grouping of the text, when you go to place the image in the text, it would only work on the first text that falls under the image.
Layer order
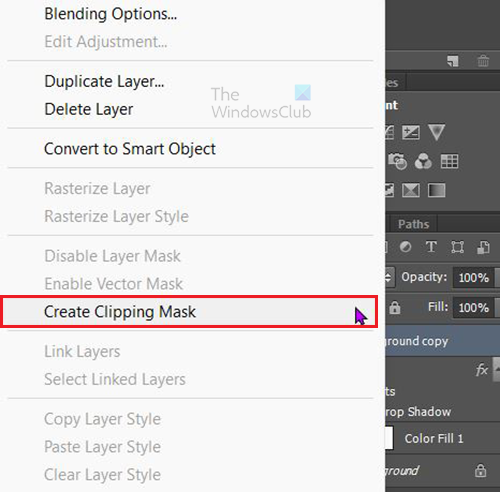
To get the image into the text, you will have to make sure that the image is above the text in the layers panel. Depending on the size of your image and the text, the image may cover the text or even the entire canvas. Since you have grouped the texts, you will see the image above the group folder. The order in the layers panel would be: one of the images at the top, the group with the text below it, then the remaining images at the bottom. This last image will be the background image, it will also help with the final effect. Remember that having two images is optional and is used in this article for an effect that you will see close to the end. If the image to be placed in the text is not above the text then the procedure will not be successful. With the layers in the correct order and the texts in the groups, right-click on the top image and choose Create clipping mask. You will see a down-pointing arrow appear on the image in the layers panel.
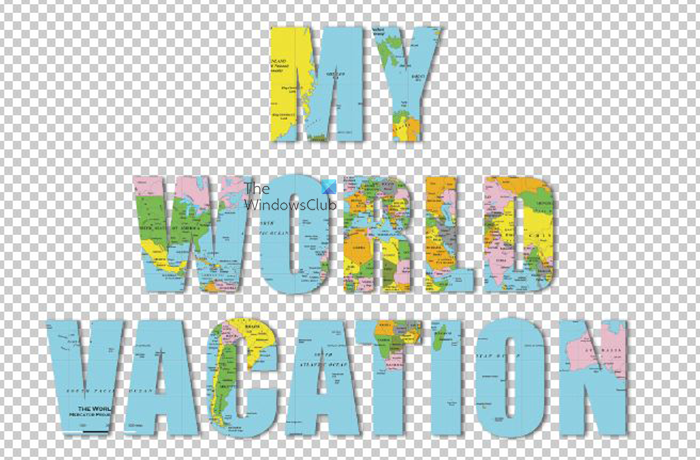
On the canvas, you will see the image outlined in the text. This one image will show in all three texts, and it is not duplicated but one continued image. this is possible because the texts are grouped so the effect works on all of them. If you write another text or place any shape inside that group folder, the image will also show in it.
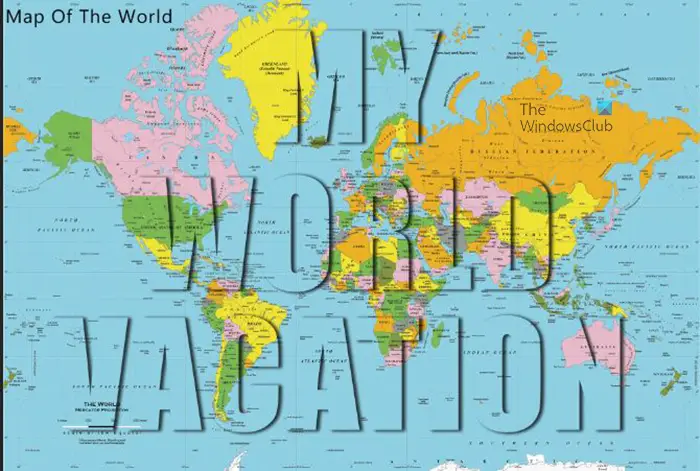
This is what the clipping mask would look like if the background image visibility was kept on. It is ok, but it creates distractions.
8] Add additional effects
Now that it has gotten this far, this could be the end of the project. However, there is more that can be done. Turn on the visibility for the background image as it will be used now. Add color fill layer You can now add a Color fill layer to give the background a different color. To add the Color fill layer, select the background image then click the Create a new fill or adjustment layer icon at the bottom of the layers panel. The menu will pop up, select Solid color and a color Picker will appear for you to choose the color. Choose the color that you want then press Ok to confirm.
A color background will appear behind the words. Lower opacity of color fill layer (optional) This part is optional, you can keep the Color fill layer as it is. But to make things even more interesting, you can turn down the Opacity or the Fill of the color fill layer.
To do this, click on the Color fill layer then go to the top of the layers pallet and click the Fill or the Opacity value, and set the one you choose to 80%. In this article, the Opacity is changed to 80%. You can see the background showing through the color fill. This was the reason for keeping the image as the background, it creates a nice blend. Add drop shadow You can do a drop shadow on the text to make them stand out. To make the same change on each of them, select the group folder instead of the individual texts. Click on the group folder then go to the bottom of the layers panel and click the Fx icon. When the menu appears, click Drop shadow. The Layer Style window will appear, adjust the drop shadow settings to your preference. You may add additional layer styles to the image, however, overdoing it will take away from the beauty.
This is the image with a drop shadow effect added.
9] Edit images and texts
There may be a time when you want to change things in the artwork. This is now easy, you can edit the text and change the images quite easily. Since the images and texts were converted to smart objects, they can be changed (updated). When you want to make changes to the smart object whether the image or the text, go to the layers panel and double-click on the (thumbnail) of the text or image that you want to edit.
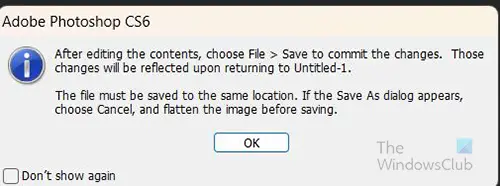
An instruction will pop up that tells you to click File and then Save to keep the changes. When you click OK, you will be taken to a new canvas with the text or the image. You can make changes to the letters in the text there and other changes as well. For the image, you can replace it. When you are finished, you can click File then Save and move to the original document, you will see the changes there.
This is the updated artwork, there are new pictures, the words are changed and more effects were added to the words. Note that the words can be changed without having to edit them like a smart object. If you want to edit the text just click the Horizontal type tool and click the text and you will be able to change them. Read: How to create a Watercolor Splash in Photoshop
Why is placing Layers into Groups important in Photoshop?
Placing layers into groups is important because it can help with organization. Layers can be organized based on what part of the project it fits, groups are also important because it helps with applying styles and effects to a large number of layers. When you want to apply the same style to a large number of layers, you can place them in a group and then apply the style to the group.
How do I change the size of multiple layers in a group in Photoshop?
If you want to transform all the texts in a group to the same size and have it done at the same time, click on the group folder and then press Ctrl + T, this will bring up the Transform box, you can then stretch or shrink and it will change all the elements in the group folder all at once. This is important as they will all be changed by the same size proportionate to their original size.

