Repair PDF using PDF Fixer Tool
If you have any corrupted pdf files that are of utmost importance, you can repair those PDF files using the PDF Fixer tool on your Windows 11/10 PC. The procedure to use this tool is as follows: After downloading PDFFixer PDF Recovery Software Tool, save the file on your PC, and run the file. Once the software window opens up, drag the corrupted file into the app area.
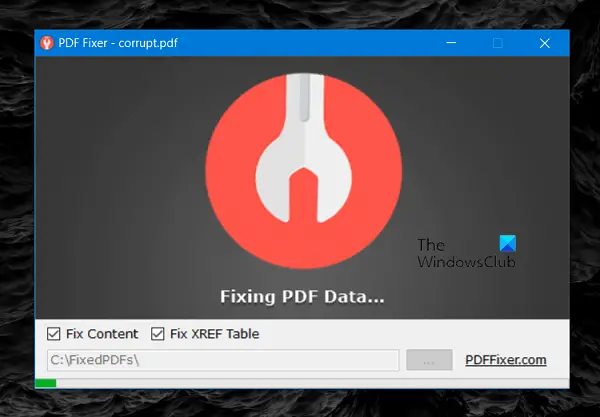
Here, I am using a corrupted file with the filename “Test File”
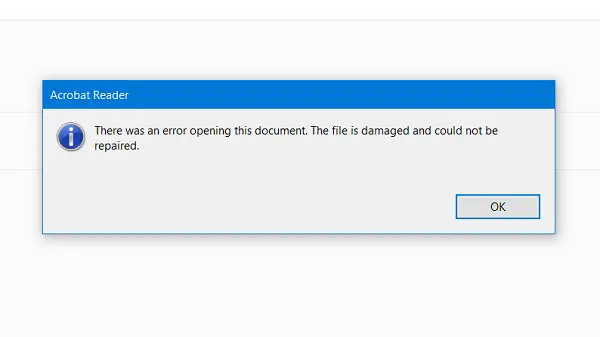
When trying to open the file with Adobe Acrobat Reader, it is unable to open the file. The error dialog box stating that the file is damaged and could not be repaired.
This is when we use PDFFixer. Thanks to the “drag and dropped” interface of the software, it was easy for me to drag the “Test File”, and managed to drop it in the software window.
You can see, in a few seconds, the file has been fixed and is saved to the C:\FixedPDFs\ directory.
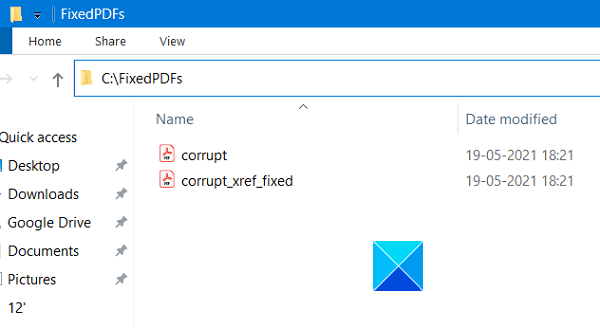
If you want, you can change the directory of the fixed File storage location. Upon fixing the file, the FixedPDFs folder shows both the fixed pdf and its XREF fixed version. A new window of Fixed PDF Preview also opens up, showing the preview of the fixed pdf file. The PDF Fixer software is really easy to use and straightforward software that you can use on your computer without having a second thought. Using this free repair utility, you can repair your corrupted PDF files just by following a few simple steps. This essential tool is a must-have if you have PDF files that are of utmost importance. It can save you a lot of time and money when you end up messing with your PDF files or receive some bad ones. You can download it from its home page at pdffixer.com. Hope you find this application helpful.