Index your music & videos with MediaArchive
The software we’re going to look into today is one called MediaArchive, and from what we have seen since using the program for the last two weeks, it works quite well. There are quite a few things you can do with this tool, and as expected, we are going to discuss a few of them. Additionally, we should note that MediaArchive is free to download and use for as long as you want. Let us talk about this free software in more detail.
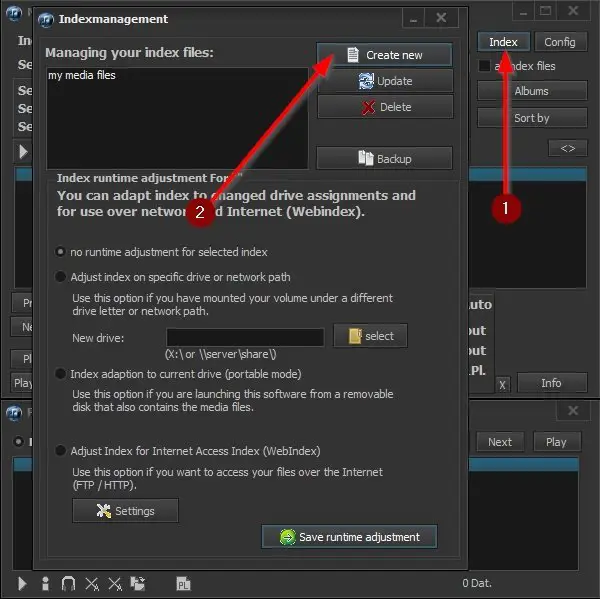
1] Index your files
After downloading and installing MediaArchive, then the next step to take here is to index your files. You can choose to add either video, audio, or both, it doesn’t matter. As long as the program can recognize the file format, everything should move in the right direction. OK, so in order to add files, please click on Index, then select Create New from the window that appears. Give the index a name, then select Add Directory. Click on the correct folder with your audio or video, and promptly add them to the program. Complete the task by clicking on the green button at the bottom.
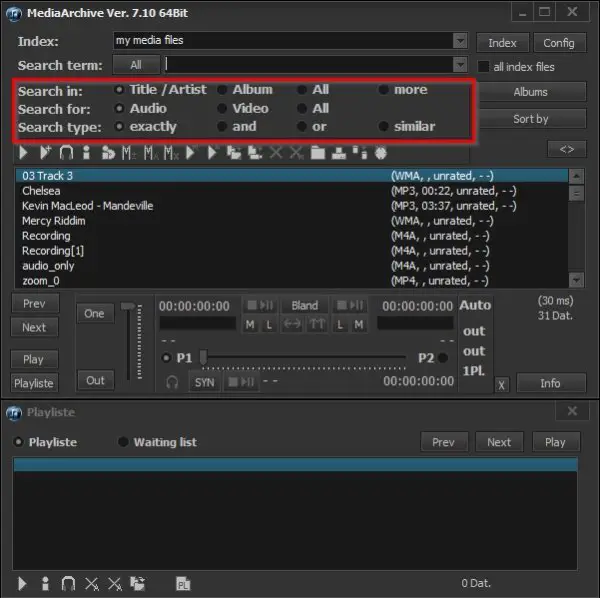
2] Search for your files
After indexing, you can then move forward with searching for the content you want. This is easy, so let us explain. To search for content, look for the words Search Term on the main menu, then click inside of the box and type your query. When done, hit the Enter key to start the search right away.
3] Be more precise with search
In order to be more precise, you can choose any of the following options before pressing Enter:
Search In: Title / Artist, Album, All MoreSearch For: Audio, Video, AllSearch Type: Exactly, And, Or, Similar
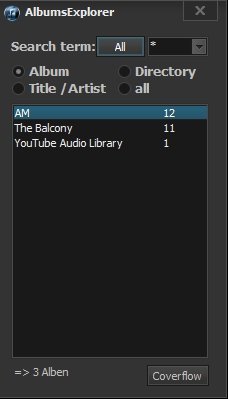
4] Use the Album Explorer option
If you want to search specifically for albums, then take full advantage of Album Explorer. From here, you can search for an Album, Title / Artist, Directory, and All. You can even list each album currently within the Index by clicking on the All button.
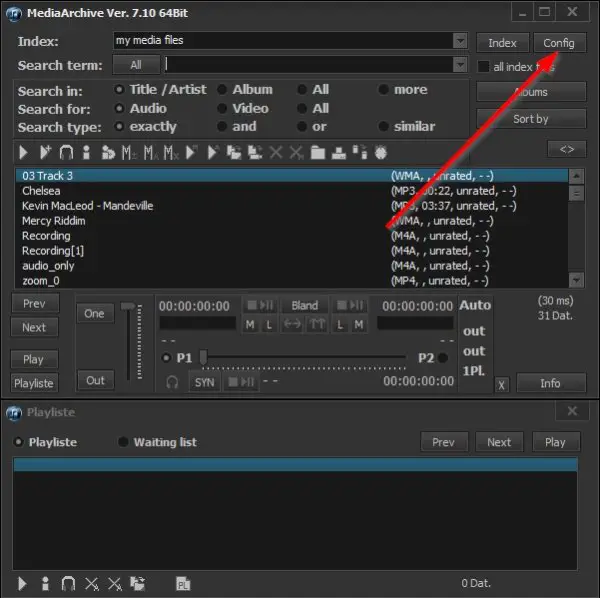
5] Configure the app
There is an option to configure MediaArchive for it to best suit your needs. In order to do this, please click on the button that reads, Config, and a new window should appear promptly. We are going to talk about some of the options here. DJ Mode: MediaArchive is not just about indexing your audio and videos, but it can also playback content. With the use of DJ Mode, you can change how the tool handles the playback of music. For example, it is possible to configure how crossfade and audio fade works with just a few taps of the mouse and the keyboard.
Search Settings: The search feature in this program is critical since users will be using it quite often. So, as you can tell, it has to work well. Luckily, the creators have added the option for you to configure this area of interest. You can decide to keep search parameters or not, change how the displayed data is shown, delete the search history in its entirety, and more. Design: The basic design of MediaArchive is quite bland if you ask us. But from the Config menu, you can change the look of the app. Simply select the Design tab, then click any one of the themes available on the list. Once you’re done configuring the tool to your liking, please click the Save Config button. You may be required to restart the software to enable the changes. These are just some of the tabs within the Config menu. There are 13 overall, so take a look at all to see what you can do to make MediaArchive yours. You can download it here from its homepage.