Recycle Bin Rename option is grayed out
To do so, bring up the ‘Run’ dialog box by pressing Win+R in combination. Type regedit and hit ‘Enter’ to open the Registry Editor.
Next, navigate to the following key:
Scroll down to CLSID and finally on: Double-click on Recycle Bin – seen in the right-side pane.
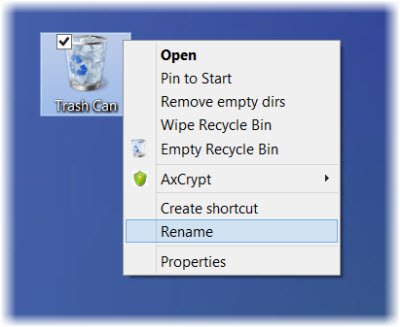
In the ‘Edit String’ window that opens, type in your ‘New’ name that you want to give the Recycle Bin, into the Data Value box and click OK. Here, I have named it as ‘Trash Can’.
Click OK and exit. To undo the changes made just navigate back to the Value Data box and clear the string.
Rename Recycle Bin for All Users in Windows
But doing this will change the name of the Recycle Bin for the Current user only. If you wish to rename the Recycle Bin for All Users, you can do so, using the Windows Registry. In this case, navigate to the following key:
In the right-side pane, double-click on LocalizedString. If you try to rename now, you may get a message Error Editing Value. You may then have to take ownership & full control of this Registry key. You may do so manually or easily by using our freeware RegOwnIt. Having done that, you will now be able to give it a new Value Data, say Trash Can. To reverse the changes and go back to default, change its Value to @%SystemRoot%\system32\shell32.dll,-8964. Make sure you create a system restore point or back up the registry first!